

If you want to create your own or contribute to an existing GitHub project, you are on the right page.
Contribution scenarios
Choose before cloning:
| Your scenario | Remotes | Path |
|---|---|---|
| Write access to the project | origin is the shared repository | Clone → topic branch → push branch to origin → PR into the project's base |
| External contribution via fork | origin is your fork; upstream is the original | Fork → clone fork → add upstream → topic branch → push to fork → PR into upstream |
Both paths keep the complete article accessible; use the contents to jump between steps. Check the project's contribution guide, actual base branch and test command first.
Main principles
- The main branch is protected, preventing direct commits.
- Developers work in their own branches derived from the main branch.
- Developers submit pull requests for their changes.
- Once a pull request is approved, the code is merged.
- A release is then created.
- The new code is deployed via a deployment pipeline.
The author prepares changes and responds to review; maintainers decide acceptance and merge under the repository's policy. Release/deployment may be separate workflows and are not guaranteed by a merge.
Text alternative to the diagram: author branch → commits → pull request → checks and review → maintainer merge → optional release/deployment.
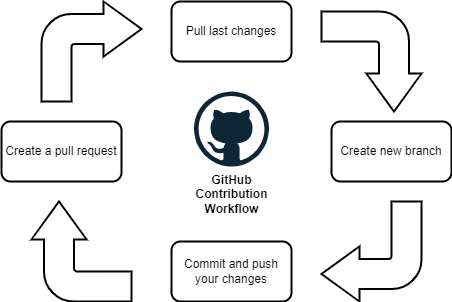
Steps for contribution
0. Prerequisites
- Ensure Git is installed on your machine: Git downloads
- Have a code editor (IDE) ready, such as Visual Studio Code
1. Pull the latest changes from upstream into your local repository
To start working on your contribution, you first need to retrieve the project in your local repository:
git clone https://github.com/OWNER/PROJECT.git
cd PROJECT
git remote -vReplace OWNER/PROJECT with the writable project or your fork, according to the chosen scenario.
Before you start making any changes to your local files, it's a good practice to first synchronize your local repository with the project repository:
# If the default branch is "main"
git switch main
git pull --ff-only origin mainFor a fork, first add git remote add upstream https://github.com/UPSTREAM_OWNER/PROJECT.git, then use git fetch upstream and git merge --ff-only upstream/main on local main. Replace the base branch if needed. Stop on divergence and resolve it deliberately; do not force-push to make the example pass.
2. Create a new branch
Rather than making changes directly on the "main" branch, it's a good practice to create your own branch. This creates an environment for your work that is isolated from the main branch.
Use this command to create a new branch and immediately switch to it. The branch name should briefly describe what you are working on, and should not contain any spaces:
git checkout -b my_new_featureFor example, I used git checkout -b doc-fixes because I was making some small fixes to the documentation.
To show your local branches, use:
git branchYou should see your new branch as well as "main", with an asterisk next to the branch that's currently checked out.
3. Make changes in your local repository
Open your editor and implement the intended change. Uncommitted changes belong to the working tree and can follow a branch switch; they are not safely isolated merely by naming a branch. Check git status, review git diff and run the project's targeted tests.
4. Commit your changes
After you make a set of changes, stage them:
git add <intended-file>
git diff --cached
The description of your commit must be clear, explicit, and understandable to anyone, for example:
git commit -m "fix: typos in set_config docstring"This commit message might be included in a changelog. Commit messages should follow Conventional Commits , e.g. feat:, release:, hotfix:, fix:.
If you are making multiple sets of changes, it's a good practice to make a commit after each set.
5. Push changes to your branch
When you are done making all of your changes, upload them to your branch:
git push origin my_new_featureThis command pushes your changes to the my_new_feature branch of your fork on GitHub.
If you chose the write-access scenario, it pushes to the shared repository instead. Checkpoint: the remote branch contains the intended commits and no unrelated changes.
6. Create a pull request
A pull request is created when a developer asks for changes committed to a specific branch to be considered for inclusion in another branch of the repository.
Go to your GitHub project's web page, open the Pull requests menu, and click New pull request, then Create pull request.
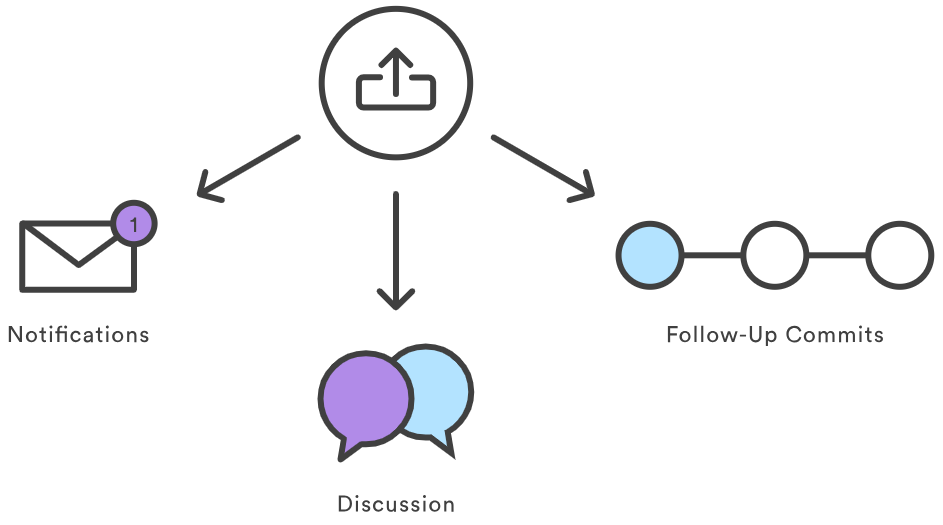
If there are no conflicts between your fork and the main branch, your pull request will be created and contributors will be notified. They will then review your changes and choose to merge your code or not.
Add colleagues working on the repository as reviewers and yourself as an assignee - reviewers will be notified by email automatically. As a best practice, let your colleagues know about your pull request through a direct message, as GitHub emails are frequently ignored.
7. Code review
Before merging, the code should be reviewed by peers - code review involves one or more team members checking another teammate's work.
8. Merge to the main branch
The maintainer (or an authorised contributor) merges only when required checks, approvals and conflict resolution are complete. The author then verifies the merged PR and synchronises the local base. Nothing in this article is a record that your own PR has been accepted or deployed.
Golden rules
- Commit each day.
- Never commit directly to the main branch - always protect it.
- Adopt a naming convention for your branches (e.g.,
feat/for a new feature,fix/for a bug fix). - Adopt a naming convention for your commits.
- Enhance security in your code with the principle of least privilege.
- Prefer recreating resources over patching them in place when using IaC.